
- Introduction
Chatbots are a faster, smarter, and more scalable conversational AI platform for enterprises in the Fourth Industrial Revolution era. A Chatbot is software that replicates instant human-like conversations with users over chat.
Chatbots come in a variety of formats and interfaces, and they can be free or pricey. In this article, I will go over how to create a WhatsApp chatbot in six simple stages. Before I get into my topic, I’ll explain WhatsApp Chatbots, why they’re significant, and some conditions for creating a Chatbot on WhatsApp.
What is a WhatsApp ChatBot?
A WhatsApp Chatbot is software that automatically responds to WhatsApp messages. It works around the clock and allows you to hold several discussions with various persons at once. WhatsApp Chatbots are commonly employed to deliver information about a company’s products and services by automatically answering client questions. WhatsApp Chatbots, on the other hand, are frequently built on a conversational flow that consists of three basic elements: i) Trigger, ii) Action, and iii) Condition.
Why are we using WhatsApp chatbots?
A superior WhatsApp chatbot that is tailored to your business will provide you with a significant advantage. Your consumers will get rapid solutions to their questions. As a result, you can save time (responding in seconds rather than days) and lower contact center costs. Obviously, you will be more efficient, friendly, and interactive on WhatsApp, hence increasing the value of your brand.
Though the WhatsApp chatbot is not human, it can answer many questions at once. The WhatsApp Chatbot ecosystem prioritizes safety and privacy and is free of adverts and spam. By default, end-to-end encryption is enabled.
There are several reasons to use WhatsApp’s chatbot:
- To enable automated responses outside of business hours, i.e., 24/7 (customized messages to customers).
- To enhance marketing campaigns, lead generation, and sales initiatives.
- Improve client service by providing better assistance and experience.
- Create a strong brand identity by proposing new products and services.
- To integrate your chatbot with your current CRMs, such as Hubspot, Shopify, or Zoho.
Not only is WhatsApp one of the world’s largest and most popular messaging apps, with over 2 billion users, but it is also available in over 180 countries and 60 languages. Furthermore, by January 2020, WhatsApp had over 5 billion installs on the Google Play Store, making it only the second non-Google app to reach this milestone.
Since your customers are already present, you should use WhatsApp. As a result, they are simply waiting for you to send them a message, and this big user base undoubtedly provides WhatsApp bots with easy access to a large market. To begin a chat, no new instant messaging app is required.
- Procedure
There are two options for creating a WhatsApp chatbot:
1) Manually write the chatbot’s code.
2- Use Chatify Bot to create chatbots that don’t require coding knowledge.
Obviously, manually coding the chatbot demands technical skills that can be difficult to manipulate. So, if you are not an expert and do not have a developer, I propose the second approach.
Building a WhatsApp chatbot with Chatify Bot is extremely straightforward and can be completed without writing a single line of code. To create a WhatsApp bot, follow these major steps:
- Sign up Chatify Bot: At first, you must go the Chatify Bot website and fill up the “Pricing” page (https://chatifybot.ai/pricing ).
- Connect your WhatsApp business account on Chatify Bot:
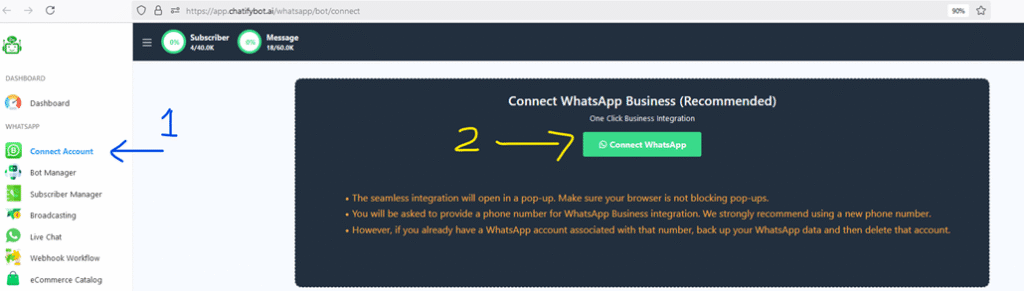
Next, there will be a pop-up window, it will ask you to log in to your Facebook account. If you are already logged in, just click on the “Continue as” button.
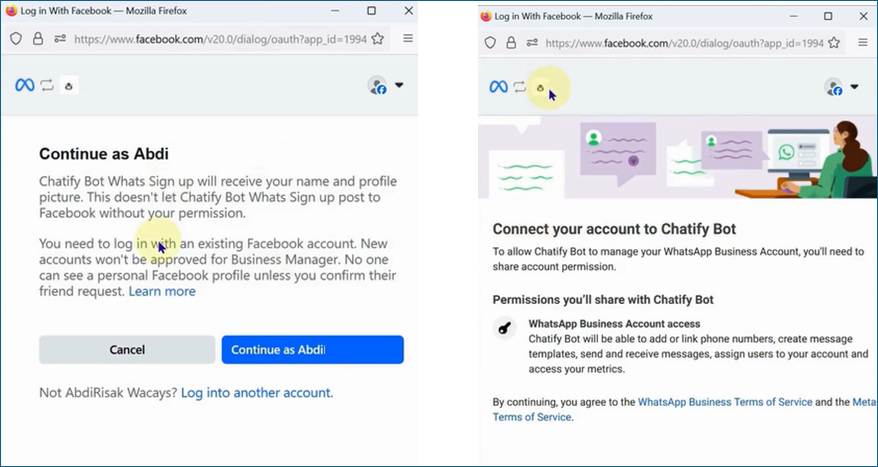
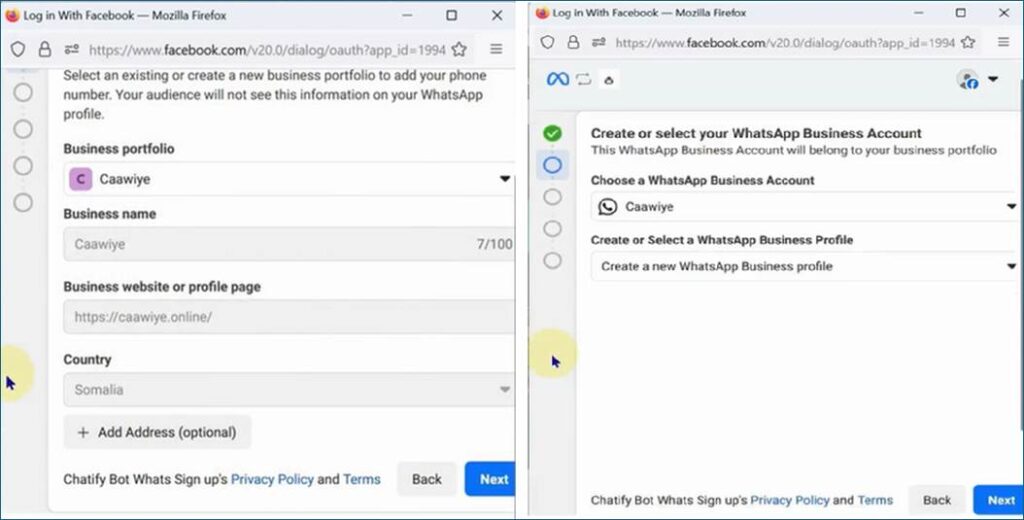
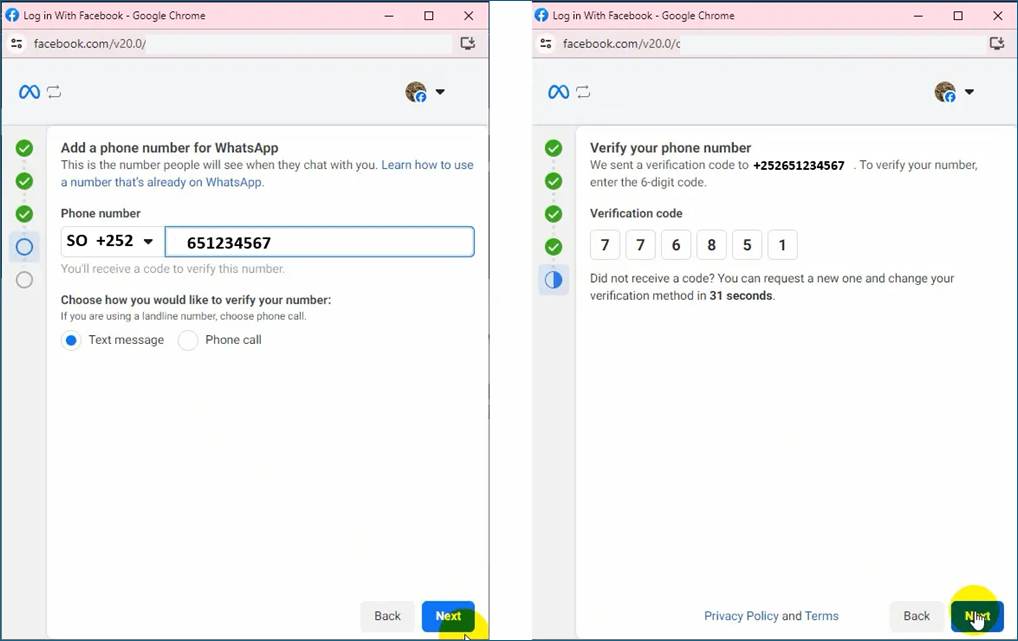
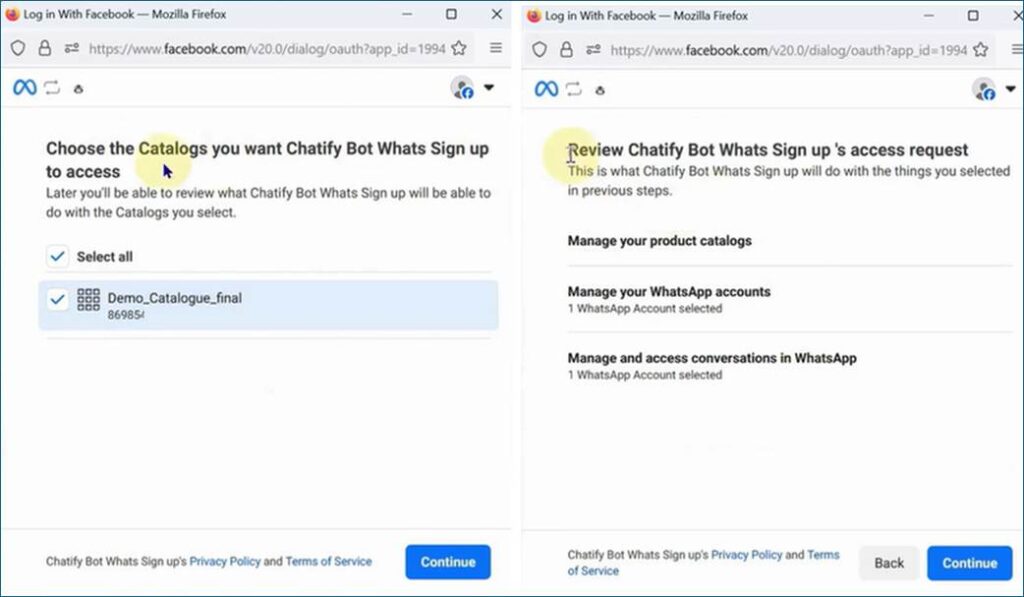
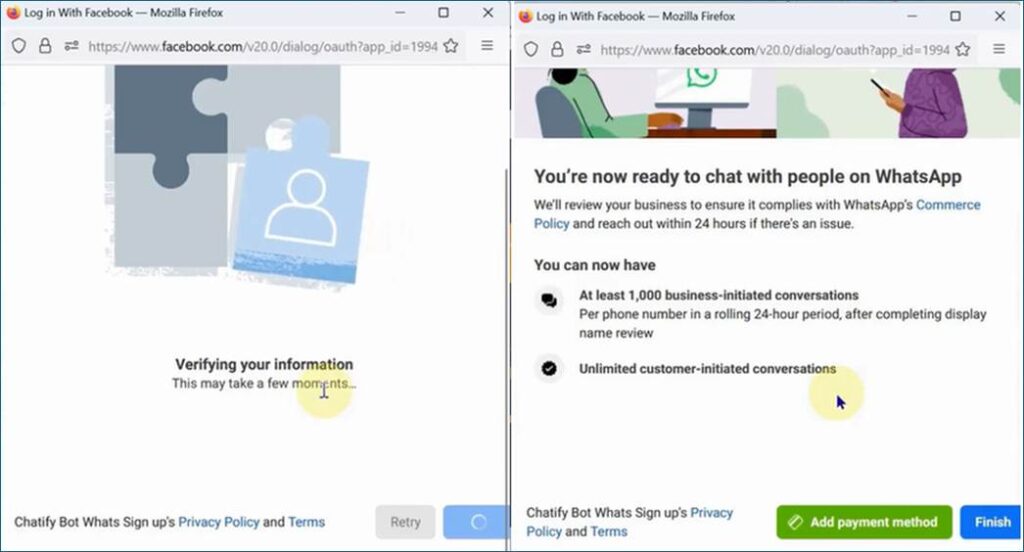
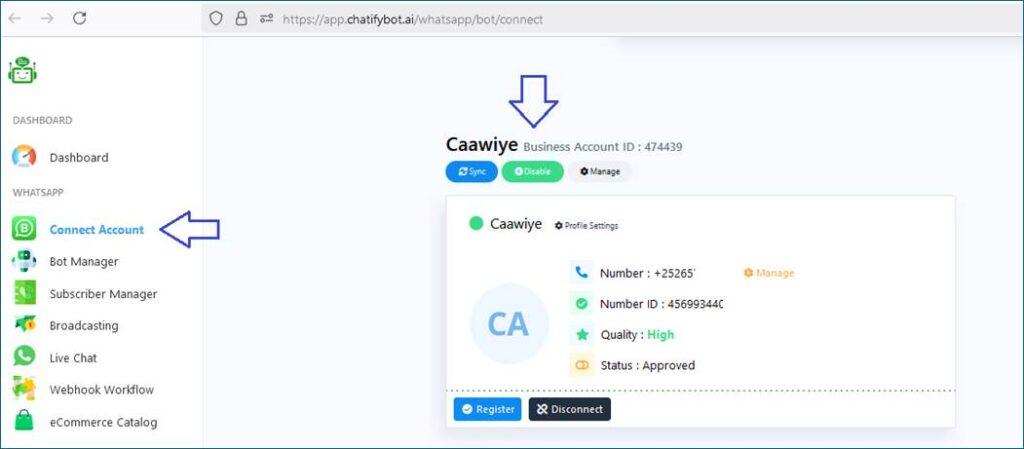
You will get a success message from Chatify Bot, and your connected WhatsApp business account will be visible.
- Create Chat bot
Follow the following steps: –
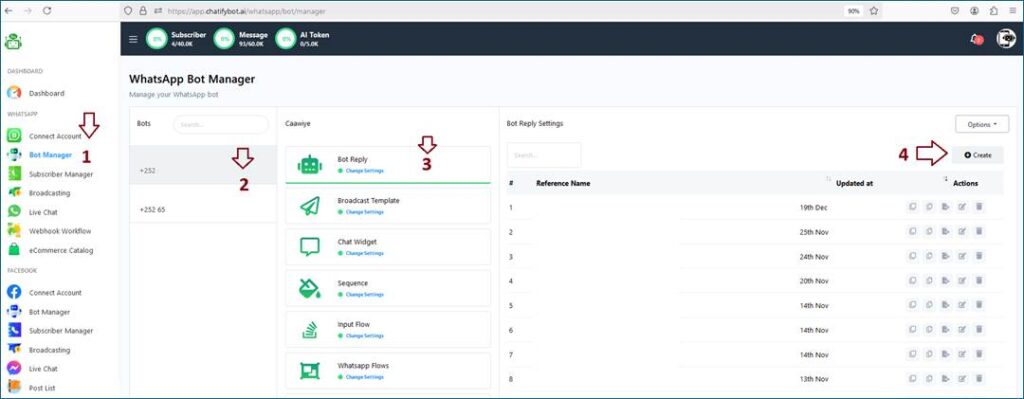
Instantly, a bot flow-builder canvas will appear if you complete the above task successfully.
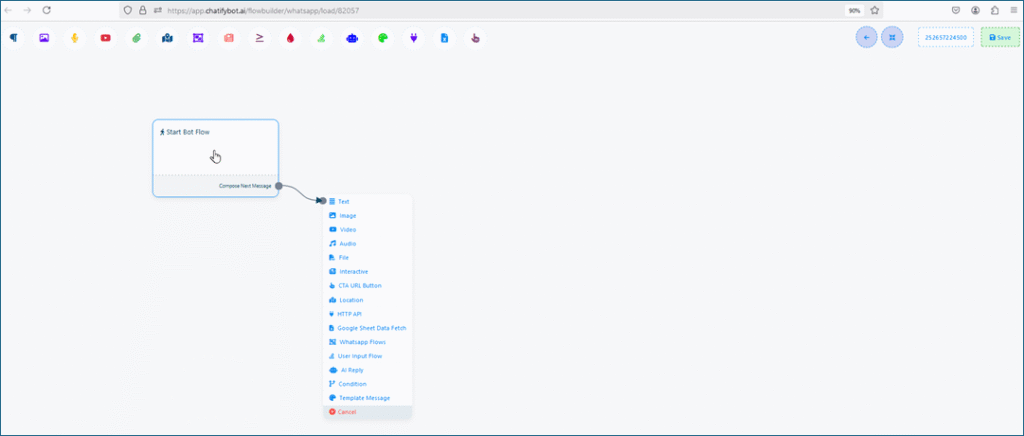
The document menu, which has 11 components, is located on the left side of the canvas. You can use the boxes to drag and drop any component onto the canvas. Suppose you choose the “Trigger” tool. Then drag and drop it onto the canvas. A trigger component will now appear on the canvas; double-click it to customize it. A trigger configuration sub-menu will appear immediately on the top-right side of the canvas. To save, enter a term such as “Start” and click the “Ok” button.
Connect the trigger to the “Start Bot Flow” by inserting the “Trigger” socket. So, you double-click the “Start Bot Flow” button, and a configuration modal form called “Configure Reference” appears in the top-right corner of the canvas.
Next, give it a title and press the “Ok” button to save it. Then, drag from the “Next” socket of “Start Bot Flow” and drop it on the canvas. You will instantly see a list of components.
You can choose any tool here. Suppose you select the “Text” option. To configure it, double-click on it. A modal form will display immediately on the top-right side of the canvas. To respond, type a message in the message field and save it by clicking the “Ok” button.
If you wish to elaborate your bot, you can drag and drop the “Next” socket from here onto the canvas. You can construct a post-buck button, a user input flow, and so on. Similarly, on the canvas, you will create your bot based on your thoughts.
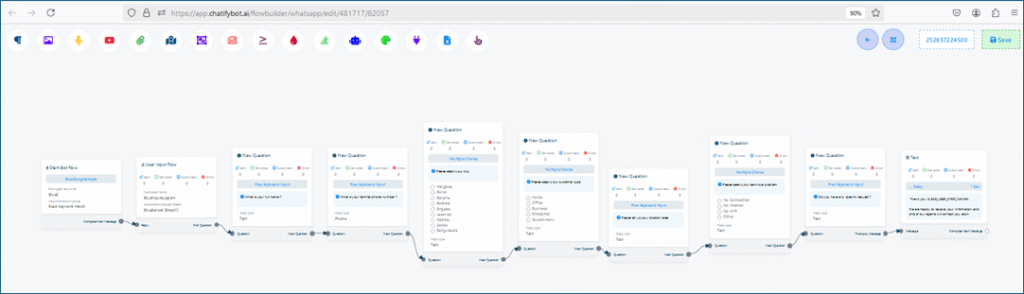
Chat using a WhatsApp number to test your WhatsApp chatbot.
You may now start a chat conversion in WhatsApp Apps using a consumer WhatsApp number. First, send a message with the keyword specified in the Trigger. Next, test your WhatsApp chatbot. If the conversion is successful, the bot creation will be fine.
Improve your chatbot by monitoring:
You may improve your chatbot by gathering client feedback and monitoring its discussions using our platform.